


I have seen and read so many opinions and questions about creating and making previews for TpT products. Everybody has a point of view about it. I am going to share my own experience and I hope it helps someone out there.
PREVIEWS ARE ESSENTIAL!!!
It's a no brainer for me. All my products HAVE to have a preview.
When I go shopping in a store, I want to touch and feel what I am going to purchase. I want to know:
What is the quality?
Is it worth the price?
Why buy it here, when I can get it somewhere else?
Your product preview needs to answer these questions and entice your potential customers to purchase from you and nowhere else.
My product previews are ever evolving. There is no "right" or "wrong" way of making them. However, I have streamlined the process over the years. Sometimes a collage preview is appropriate. Other times, the preview needs to be a close up of a few pages in a much larger product. Let me show you what I mean.
COLLAGE PREVIEWS
After I make my product and save it as a PDF to upload, I also save all the slides (PowerPoint) as JPEGs. I create a new, one page landscape file, so I can arrange all the pictures of the pages that are included. I want my potential customers to know what they are getting. I don't want them to have to guess. Here is an example of a collage preview:

This file is editable and comes with color and black and white pages. I made sure to include all the color pages in the preview, however, in the product description I explain that black and white versions of each page are also included. Product descriptions are extremely important, as well. However, not everyone reads them carefully, so your preview is the first key to getting your buyers interested. Think of it as a visual "hook." After you make your one page collage preview, save it as a JPEG or PNG file to upload to TpT.
MULTIPLE PAGE PREVIEWS:
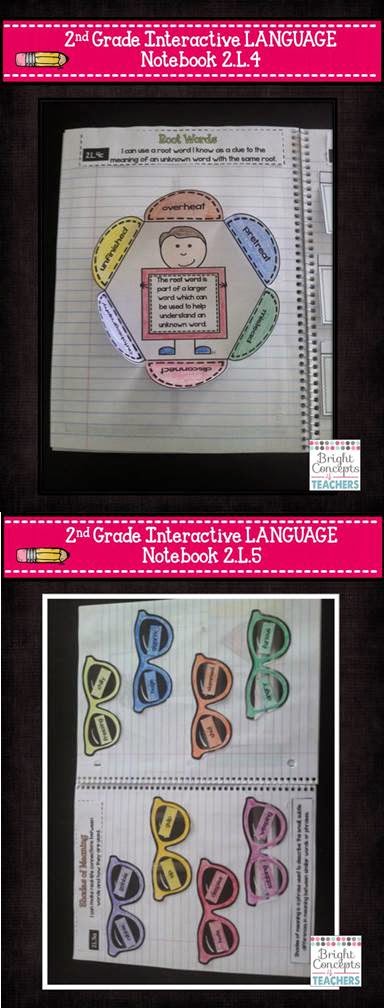
Some products require a more detailed preview; a collage preview just won't do it justice. I use multiple page previews for larger products usually. This helps potential customers get a CLOSER look at a few sample pages. Here is an example from my 2nd Grade Interactive Language Notebook preview:


MULTIPLE PAGE PREVIEWS:
Some products require a more detailed preview; a collage preview just won't do it justice. I use multiple page previews for larger products usually. This helps potential customers get a CLOSER look at a few sample pages. Here is an example from my 2nd Grade Interactive Language Notebook preview:
Each page is a full size. Customers can get a close look at what the pages look like once they are completed and get an idea for the quality of the product. It is important to watermark or put your blog button on every page too! Since this type of file is multiple pages, you need to save it as a PDF file instead of a JPEG.
I hope you were able to get some ideas of how to make your previews work to showcase your products. I would love to hear how you make your previews and what you think is important to include too.
Make sure to head on over to read some more fabulous tricks and tips from my sweet blogging pals.
 |  |  |  |
 |  |  |  |
 |  |
Hi Jamie,
ReplyDeleteThanks for the tips. I have excitedly been gleaning all these tips from ya'll and have been wondering how to do multiple pages for ages. It looks as if you have 2 pages put together in your examples. Are you make extra long pages? Are you using powerpoint? The you save the file of multiple slides as a PDF? Sorry I'm not sure I am understanding.
Pauline
First Grade by the Sea